Open & Execute Jupyter Notebooks in Android
Run your beloved Jupyter Notebooks on Android Devices
Is this even possible?
Yes, it is!
Undoubtedly, Android Phones are the most accessible devices one can get their hands on. Apart from Colaboratory Notebooks which provide a web-interfact to run your Python Notebooks, It still requires the use of internet and dealing with Colab on Mobile Browsers is tedious compared to the UI of Jupyter Notebooks that one gets comfortable with easily.
I have prepared a step-by-step procedure on "How to Create, Open and Run Jupyter Notebooks on Android" wherein all of us can benefit the portability that Android Devices provide with the ease of usability of Jupyter Notebooks.
Let's get started....!
Step 1: Downloading Necessary Applications
Visit Google Play store and download these two applications:

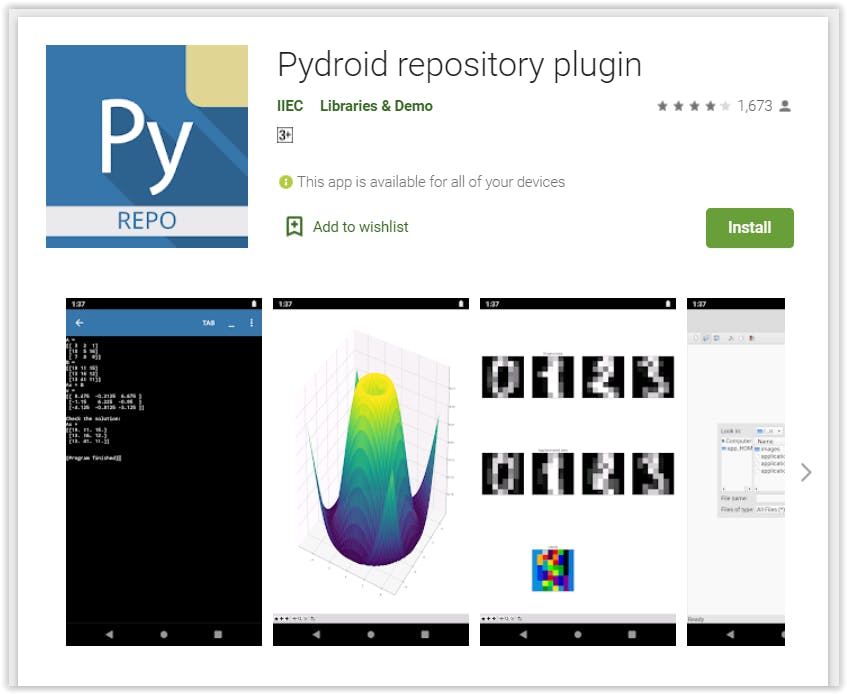
Step 2: Opening Applications
Open Pydroid 3 IDE and click on the sidebar to navigate to “Pip” and click on it.
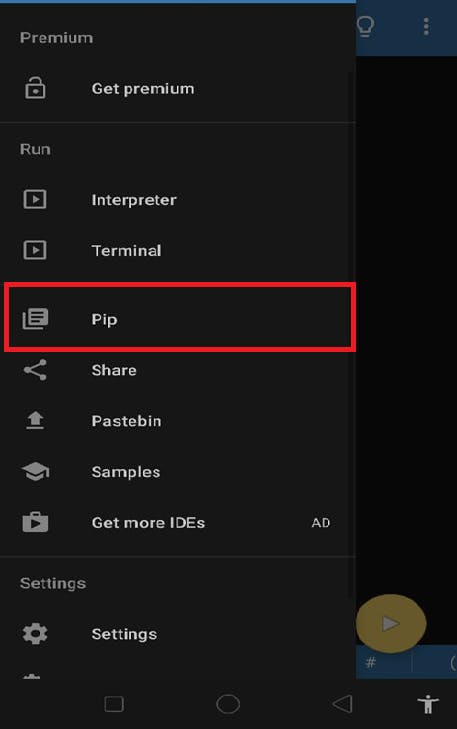
Step 3: Installing Jupyter in PyDroid 3 IDE
Once you clicked on Pip, it will redirect to a page with options shown in the screenshot, scroll down to click on “jupyter”.
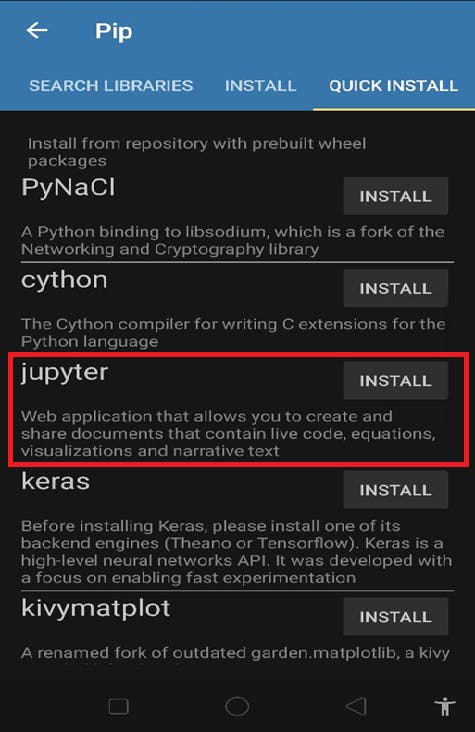
Step 4: PyDroid Terminal and Jupyter
Once you click on jupyter the installation will start. Once installed, navigate to the sidebar of the Pydroid IDE and click on terminal.
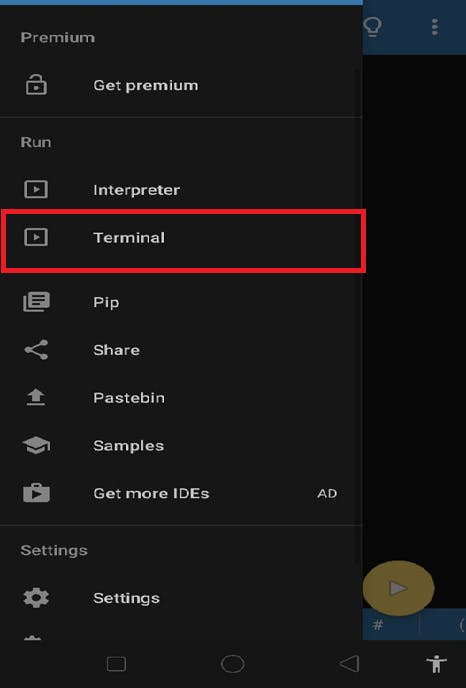
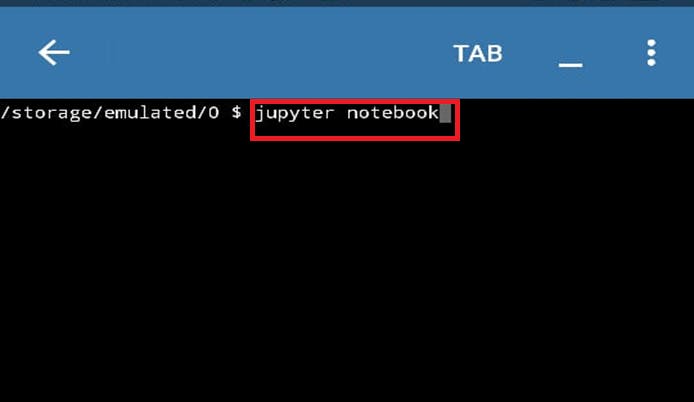
Step 5: Run Jupyter Notebook Local Server
In the terminal, type the command:
jupyter notebook
Step 6: Fun Time!
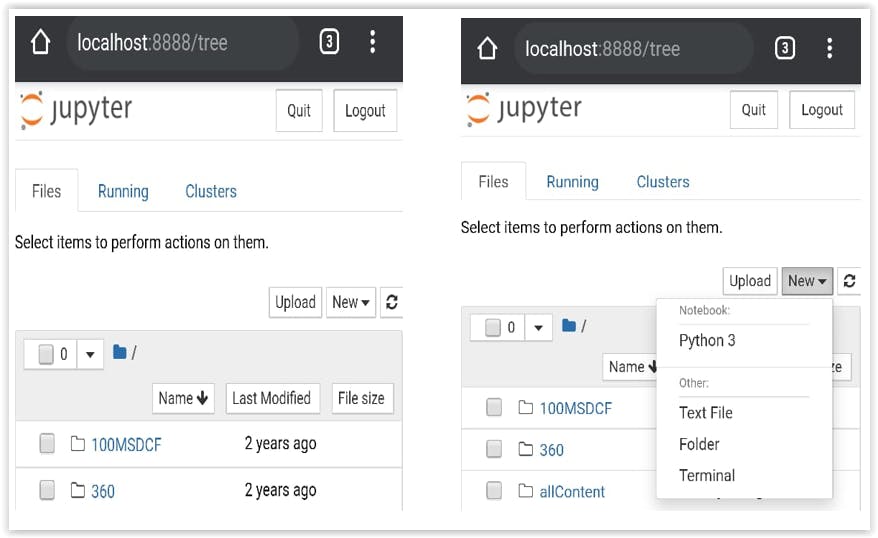
as soon as you type the command, a browser window shall open with the jupyter notebook homepage, click on new -> python3 and start coding!!!
Finally,
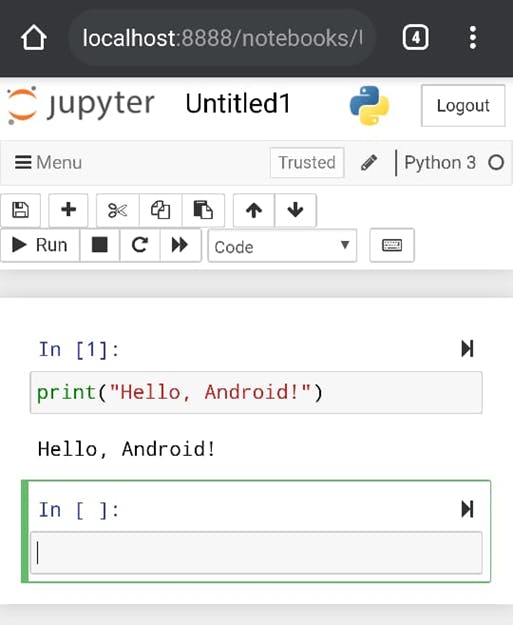
Run your first notebook cell, and enjoy coding on your new portable Jupyter Machine...!
Key Notes:
- You can now run Jupyter Notebooks on your android device
- You can save them in the .ipynb file format
- The .ipynb notebook is stored in your local storage and can be convenient to share directly from your phone via Email, Whatsapp, Github and what not - endless possibilities.
- You can open exisiting notebooks by navigating the file directories within the Jupyter Notebook IDE on Android.
P.S: If you loved the walkthrough tutorial, feel free to follow me on Hashnode for more informative and productive guides. This is my very first Hashnode Blog Post and I am eager to meet the new community and connect with all.
Want to find me? I'll be available here:
